Given this objective of improving product and process quality, manufacturing procedures are in a state of constant change. Driven to accelerate throughput and reduce waste, a great deal of energy is invested in automation of the test steps. Humans cannot hope to achieve these objectives unaided by machines. As more and more quality assurance functions are automated, time and cost-intensive lab tests are being replaced by "inline at the shop floor" product inspections.
In this scenario, modern camera technology maintains an overview of the test objects and their properties at all times and in almost any location as production progresses, without actively intervening in the train of events. Optical measurement and test procedures enable lightning-fast quality tests to be carried out during the manufacturing process, and they involve absolutely no wear. When industrial cameras are used in place of simple barcode readers, not only the content of the code can be read, but the quality of the code, its alignment, color, size, surroundings and much more can be evaluated. This not only expands test capabilities and quality, but also makes automation of quality assurance easier.
Early defects detection
Cameras can provide early detection of defects that have occurred, before they cause aftereffects that may be difficult if not impossible to correct. But which camera technology is capable of meeting the stringent requirements applicable to measurement and test equipment and enabling machines to make autonomous decisions, there by providing humans with the best possible assistance, or even replacing them? “With 3D image processing, the flexibility and accuracy of measurement and test processes can be improved immensely“ said Dr. Martin Hennemann, Product Manager for Ensenso at IDS Imaging Development Systems GmbH.
Modern 3D technology
Modern 3D camera technology enables robots to analyze their environment in order to react autonomously to different situations. Besides the dimensions and position of objects in the shop floor, 3D data also enables exact conclusions to be drawn regarding deviations or imperfections with respect to reference objects. This enables inline tests to be carried out to determine whether the "right" product components are being assembled.
A high potential for error exists in the automotive industry, for example, in which production involves an enormous number of variants. Customers can assemble their perfect car according to their individual specifications. Production employees therefore benefit in particular from automated systems that sound the alarm in good time before a wrong or faulty part is installed. This reduces the effort required for subsequent checks or – which would be far worse – the risk of production downtimes.
“The high degree of individualization in the configuration of cars inevitably results in an immense range of variants, which is practically impossible to manage and check without the assistance of camera technology“ explained Dr. Martin Hennemann.
3D object verification
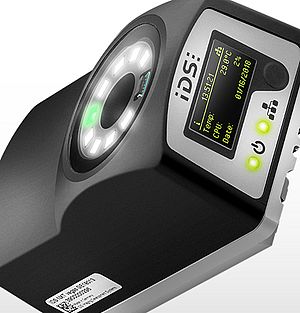
IDS demonstrated an example of "3D object verification" at the Control 2018 international trade fair for quality assurance in Stuttgart, Germany. The demo system reconstructs objects with an Ensenso N35 3D camera and then performs a comparison of data with the aid of HALCON image processing. For this, the 3D data generated is compared with a reference model which enables deviations and imperfections to be detected. 3D image processing identifies irregularities in test objects which are not even visible to the human eye. The quality of manufactured objects can be considerably improved for subsequent process steps by ultrahigh precision digitization with 3D cameras by Ensenso followed by image processing for object verification.
3D+2D technology for zero defects
For Dr. Martin Hennemann, 3D technology is an advantageous supplement to 2D camera technology. In combination, they can be used to perform an ever growing range of functions. Each of the two technologies has its advantages for certain applications. With 3D data, it is possible to determine shapes, surface structures, or the position of objects in space. 2D data enables edges and colors to be detected with precision and markings to be read. In the case of the IDS demo, 3D data is used to perform an object comparison. Any part codes present can also aid identification. They are ideally decoded with 2D camera images.
Camera systems also support manual processes in manufacturing. They monitor manual workflows at manual workstations. The image evaluation checks whether the operator picks up the right parts, the correct number of screws are fitted, or if a part has been forgotten. A downstream system indicates whether operations have been performed correctly or incorrectly by means of audible or visual alerts on monitors or by projection.
Technology in constant development
Camera and production technologies are both undergoing constant development. Having progressed immensely in the last few years, new 3D technology is able to display different features of an object. It has made new applications possible and serves as a supplement to 2D camera technology, but it does not replace it. Cameras are also evolving constantly, from simple image delivery machines to smart adaptable image processing solutions. With the right combination of camera, sensors, intelligence and versatility, machine-vision systems represent a significant contribution to error prevention in quality assurance. The use of camera and evaluation technology has therefore become indispensable for all those who want to take a big step closer to the goal of zero-defect production.
