Schaeffler UK is providing route-based monitoring services to a UK-based producer of crisps. By analysing the vibration data from a range of plant and equipment at the site, Schaeffler is able to detect any damage to components such as rolling bearings and gears early, therefore reducing costly, unplanned downtime and prolonging the life of the equipment. In addition, Schaeffler provides regular thermographic surveys of electrical panels in order to detect faulty electrical components early.
Regular on-site vibration monitoring, analysis and thermographic surveys
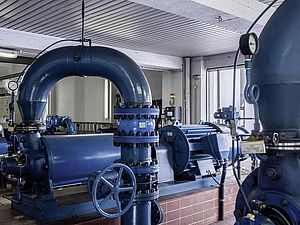
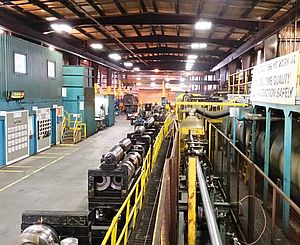
As part of its service contract, Schaeffler UK provides regular on-site vibration monitoring, analysis and thermographic surveys to the customer. A field service engineer from Schaeffler visits the plant on a periodic basis to collect vibration data, which he then analyses and then compiles a report for the customer. Crisp production at the plant is round the clock with incoming raw potatoes washed, peeled, sliced and fried. Flavour is added and the crisps are then bagged and packaged ready for delivery to customers. During each visit, a Schaeffler field service engineer takes vibration measurements to identify any deterioration of rolling bearings and other general mechanical components (e.g. gears, fan blades) on a variety of plant and equipment at the site. This equipment includes small motors, gearboxes, pumps and fans. This equipment drives a variety of plant such as conveyors, peeling machines, cold and hot washers, fryers, slicers, bucket elevators, heat exchangers, extruders and centrifuges.
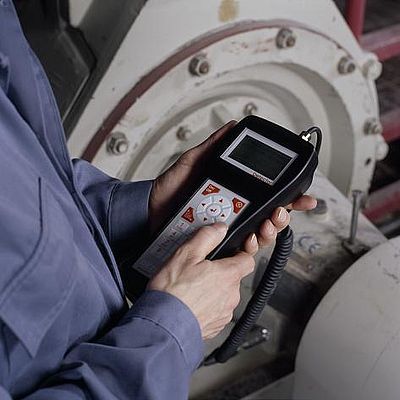
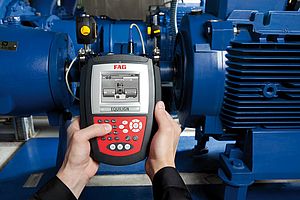
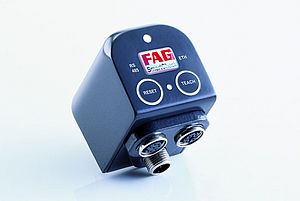
FAG Detector III
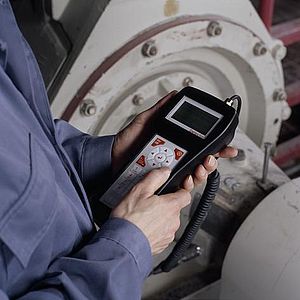
Vibration measurements are made and stored using Schaeffler’s FAG Detector III handheld vibration monitoring device. With its built-in software, ‘Trendline’, which includes a database of more than 20,000 different bearing products from different suppliers, this device enables the user to collect, store and analyse vibration measurement data. Used in combination with the data viewer, the bearing database is ideal for assessing a machine’s condition. For example, up to four different characteristic values can be stored and displayed against one measurement point (several defect bearing frequencies can be checked efficiently using a single measurement point). The FAG Detector III is used to measure and record vibration data at each selected measurement position on the monitoring route at the customer’s plant. The three basic measuring parameters are velocity (a measure of overall machine vibration that responds to mechanical issues such as imbalance, misalignment and looseness), acceleration (typically used to monitor gear defects and progressing bearing defects) and enveloped acceleration (a measure of high frequency, impact-type events, typified by early bearing or gear faults).
The measurement data is then analysed by the Schaeffler field service engineer, who then writes an analysis report and recommended action list (if this is required) for the customer’s maintenance team. The report typically includes Acceleration and/or Velocity Trend plots that show alarm limits (red and yellow lines) and how the vibration data has varied over time.
David Goves, Applications Engineer at Schaeffler UK comments: “The alarm limits for the equipment [motors, pumps, fans, etc.] are initially set at default values based on ISO recommendations. However, as the database of measurements is built up over time, these alarm limits can be reviewed and may be adjusted to more appropriate levels.”
The FAG Detector III is used to take measurements on each item such as drive motors, gearboxes, pumps, pedestal bearings (housings) and so on. For each piece of equipment included in the agreed patrol monitoring route, velocity measurements are normally taken in the horizontal, vertical and axial planes at the drive end and non drive end of each item. Additionally, acceleration measurements may be taken in the horizontal planes of gearboxes and motors. Furthermore, enveloped acceleration measurements may be taken in the horizontal plane on each item of a piece of equipment. The exact set-up for each piece of equipment may vary depending on its size, accessibility and previous history of issues.
Report on all the items of equipment
After analysing the recorded vibration data using the FAG Detector III’s Trendline software, Schaeffler is able to report on all the items of equipment and to recommend any repairs or remedial action that is required. If bearing wear is found to be the cause of high vibration levels on a gearbox, for example, this can be reported to the customer, who can then source the appropriate bearings and plan precisely when the maintenance work i.e. replacing the defect bearings, can be carried out without disrupting the rest of the plant.
David Goves cites some examples: “From a recent site visit, we analysed the data and compiled a report for the customer. This included a list of recommended actions on those items of equipment that had exceeded the pre-defined alarm limits. For example, we advised the customer to check the grease levels on certain pieces of equipment. We also reported on other more general mechanical issues such as imbalance of fans and rotor blades, and misalignment of belt and pulley drives. We also recommended that the customer checked fasteners and housing bolts on particular items of equipment such as gearboxes that were showing signs of mechanical looseness.”
Thermal imaging of electrical panels
Thermal imaging technology produces fast, accurate results in a real time, high resolution illustration, enabling engineers to detect problems that otherwise may be overlooked. Remedial work can therefore be carried out before costly system failures or production stoppages occur.
“The great advantage with using thermal imaging technology is that it is non-invasive and can detect hot areas, enabling us to evaluate the condition of electrical components inside panels and control cabinets, and whether potential problems are likely to occur,” explains Goves.
At the crisp production plant, a Schaeffler field service engineer normally conducts a site survey of electrical panels and control cabinets using a handheld thermography camera, which incorporates a built-in digital camera and customised reporting software. Equipment checked includes fuses, switchgear, wiring and cabling. “We can quickly open a cabinet and sweep the electrical components inside for any hotspots. If we do find any hotspots, these are often caused by loose wiring or cabling, a defective fuse or the fault could be due to some faulty equipment further down the line. The important thing is that we report the fault and the customer can then check it immediately before any line stoppages occur,” says Goves.


