Thanks to continuous advancements in the vertical concept, the Oerlikon C 30 Bevel Gear Cutting Machine presented by Klingelnberg sets the standard for dry processing. All bevel gear machines in this series are also equipped with a heat-stable, vibration-damping machine bed. An optimized axis arrangement ensures reduced approach paths and thus significantly less load on the drive components - and a stiffer design of the overall system. Moreover, an integrated deburring tool enables maximum productivity and utmost process safety through the use of the PULSAR method. Another highlight of this machine series: its innovative operating concept and ultra-modern control technology. The touchscreen display and the newly developed operating concept make the C 30 more intuitive to operate compared with standards commonly found on the market.
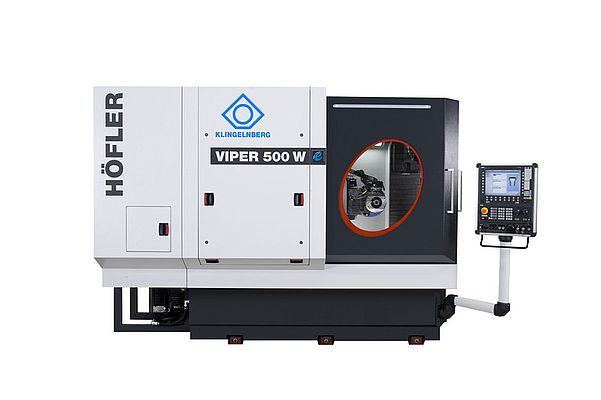
VIPER 500 cylindrical gear grinding machine: Cutting-edge technology for a fast and efficient production process
Manufacturing small batch sizes with maximum economic efficiency: The VIPER 500 cylindrical gear grinding machine is designed for component diameters up to 500 mm and specifically for small- to medium-sized batches. To suit individual requirements, the machine is available in three different configurations: profile grinding, small grinding wheels for custom jobs, and multiple-wheel technology (K) as well as generation grinding (W). The VIPER 500 W configuration allows both profile grinding and continuous generation grinding on the same machine - with minimal retooling time. To change the grinding technology, just swap the grinding wheel, the grinding wheel flange, and the dressing roll.
On all variants, the optional internal gear grinding arm allows retooling from external to internal gearing. Moreover, the special machine axis arrangement is a contributing factor in the machine's tried-and-tested precision and consistent quality, as well as tremendous flexibility. The highly dynamic axes allow optimized 5-axis machining of an entire range of modifications in the shortest possible grinding time. The innovative design also makes for easy cleaning and high performance capability while achieving significant energy savings.
P 26 Precision Measuring Center: Cutting-edge technology for maximum safety and precision
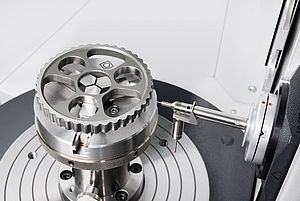
Maintaining a close-to-market presence at all times and early implementation of market requirements - with this in mind, Klingelnberg has continued to develop the P 26 measuring center, which has enjoyed commercial success for a number of years already. A height-adjustable electric control console and the vibration isolation that can be integrated, now provide even better prerequisites for shop-floor use in the new P 26. The fully automatic CNC-controlled precision measuring center is designed as a compact unit for the workpiece diameter range up to 260 mm. At the heart of the P 26 is an accurate, durable rotary table.
Configured as a measuring axis (C axis), it provides concentric seating of the workpieces to be tested. In combination with the three linear measuring axes, tangential (X axis), radial (Y axis) and vertical (Z axis), the precision measuring centers trace and inspect the functional surfaces of gearings and general drive components in generator mode. This guarantees maximum measurement accuracy and reproducibility. Distinguishing features of all Klingelnberg Precision Measuring Centers are the heavy-duty, stable beds and guide bodies made of cast iron. At the same time, all bearings and guides are backlash-free at the measuring axes. These form the basis for the high basic mechanical accuracy of these measuring centers. The integrated 3-D measurement system enables both discrete-point probing and scanning, continuous measured value logging. The results are evaluated safely and quickly using the powerful GINA software.


