Non-contact, laser profile displacement sensors from Micro-Epsilon are being utilised on a new, groundbreaking internal weld inspection system. The sensor measures the internal size and shape of girth welds on pipes that are destined for use in subsea oil and gas applications.
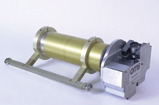
UK-based company Optical Metrology Services Limited (OMS) has integrated Micro-Epsilon's scanCONTROL 2700 laser profile sensor on its new Internal Weld Scanning Tool. This innovative tool is used to internally scan welds inside pipes - both visually and dimensionally - enabling engineers to quickly and confidently assess the quality of the root weld.
OMS is a specialist measurement technology company that provides measurement services and precision measurement systems to the oil and gas industry. A key focus for the company is in the dimensional measurement of oil and gas pipes or other similar structures suchas aero engines, process industry tubes or manufactured cylindrical objects, where dimensions are critical.
In oil and gas applications, the quality of the root pass of a weld is critical to the structur al integrity of the girth weld. Oil and gas companies therefore have stringent inspection requirements for checking welds. However, few if any tools currently exist on the market that can perform this kind of work. Welding of clad pipe is especially challenging and requires accurate measurement of the weld area in order to ensure zero defects and to avoid the delay and cost of a weld cut out later in the welding process.
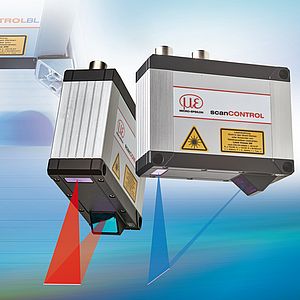
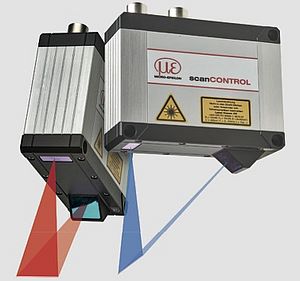
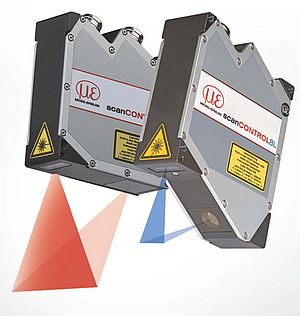
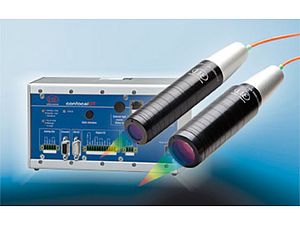
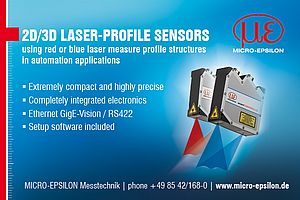
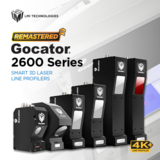
The scanCONTROL 2700 is Micro-Epsilon's latest generation of laser profile sensor. The compact design and integrated controller makes the unit ideal for industrial automation tasks and machine building applications, where space is often restricted. Other than weld measurement, typical uses for the sensor include the measurement of angles, channels, gaps, edges and clearance; detection of beads (bulges or bumps) of adhesive; door edge detection; robot guidance and positioning; groove width and depth measurement.
Unlike conventional laser line scanners, the scanCONTROL 2700 provides an integrated controller in the sensing head. The user requires no other components to evaluate the measurement data. The unit is easy to set up, configure and adapt for different applications. Measuring ranges are from 25mm or 300mm. Data is output from the sensor via Firewire IEEE1394. Additionally,a small output module for DIN rail mounting is also available to convert the sensor output data into common fieldbus systems, including CANbus, Profibus DP, Ethercat and IEEE.
The OMS Internal Weld Scanning Tool comprises two main systems: a high quality digital colour camera with sophisticated optics and lighting, as well as the scanCONTROL2700 sensor. The tool can be used to detect a wide range of weld features, including root penetration, root concavity, cracks, lack of penetration, discolouration, oxidisation, surface porosity and burn-through. To ensure that all these features are detected, the scanning system measures a 25mm wide cross-section, with complete profiles at millimetre intervals around the inside diameter of the pipe. The camera takes overlapping pictures around the pipe for review and archival.
Software provided by OMS enables the user to document and interpret these features, as well as measure the cross-sectional data. Scanning a typical 10-, 12- or 14-inch diameter pipe takes around 45 seconds in total.
Richard Gooch, Director of Technology at OMS comments: ''We chose Micro-Epsilon's scanCONTROL 2700 sensor because it is quite simply the best laser profile sensor currently available in the market, in terms of its compactness, performance and ease of integration with our inspection tool. The sensor is an enabling technology for us.''
''Not having to connect the sensor to a separate controller was also a key selection criteria for OMS, as there is no space to accommodate a remote controller for this particular application. The scanCONTROL 2700 also outputs the dimensional data in a format that's easy to manipulate. In other words, the sensor offers industry standard, open communications interfaces that make accessing the data very straightforward,'' he adds.
''Measurement speed was also an important factor in selecting a suitable sensor,'' explains Gooch. ''The scanCONTROL 2700 measures up to one thousand profiles per second, which allows us to scan the diameter of a pipe in 45 seconds.''
Accuracy and resolution were also critical, says Gooch. ''For inspection of oil and gas pipes, our customers require a system resolution of typically less than 0.1mm. To achieve a system resolution such as this, you need a sensor that is much more accurate. The scanCONTROL 2700 has a resolution of less than 10µm and an accuracy of less than 50µm, which helps compensate for other external influences on system accuracy, such as mechanical system components and thermal expansion.''
The scanCONTROL 2700 is the first high accuracy profile sensor with integrated electronics in a compact footprint. Other competing profile sensors on the market with integrated controllers are either very bulky, often two to three times larger, or their measurement performance is reduced due to the restriction in space for the processing electronics.
The scanCONTROL 2700 uses the laser line triangulation measurement principle. The sensor has an integrated, highly sensitive CMOS array, which enables measurements of almost any surface, including shiny or reflective surfaces, independent of the reflection from the target. This means excellent accuracy, resolution and reliability are achieved, even at high measurement speeds.
A line optical system projects a laser line on to the surface of the object being measured. The back-scattered light from the laser line is registered on a CMOS matrix by a high quality optical system. Along with distance information (z-axis), the controller calculates the true position along the laser line (x-axis) from the camera image and outputs both values in the sensor's 2D coordinate system. A moving target or traversing sensor generates a 3D representation of the object being measured.
The system itself comprises a sensor and integrated controller, which calculates the dimensions of the weld. The system works in two ways: either in a stationary mode, with the sensor fixed and looking at moving targets, or in a scanning mode, where the sensor works in combination with a motion control deviceor robot. The sensor uses an innovative CMOS array with a real time, high-speed electronic shutter (rather than conventional rolling shutters), which captures the entire profile and processes the information instantaneously.
Gooch concludes: ''OMS has used Micro-Epsilon sensors on its measurement systems for a number of years now. What really impresses me about the company is that it goes the extra mile in terms of technical support. The engineers at Micro-Epsilon have a good understanding of customer applications, which means they can help us to get the most from utilising their sensors.''
Laser Profile Sensor
measures size and shape of pipe girth welds
- by Micro-Epsilon Messtechnik GmbH & Co.KG
- June 1, 2009
- 1425 views


