A cost-effective approach to field calibration of thermocouples and PRT sensors permits fast and economical probe evaluation with National Standards traceability.
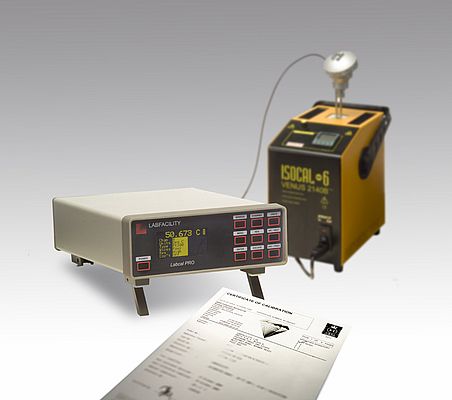
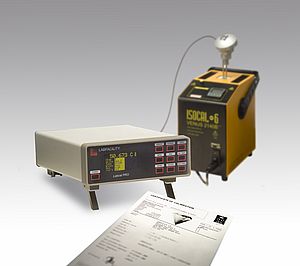
The Labfacility "mini-lab system" includes everything required for "local" highly precise calibration of Thermocouple and Pt100 probes. Considerable savings in time and expense can be achieved by using such a system instead of sending platinum resistance thermometers to the appropriate laboratories for routine or special calibrations in every case. A considerable advantage is realized when site problems associated with temperature reading errors are suspected; the system can be set up anywhere to permit fast and convenient probe checking.
Traceable Certifications
The system is supplied with the appropriate Traceable certifications and thus qualifies as a traceable calibration standard. This approach is not an alternative to the calibration laboratory but will complement the established National Laboratory calibration procedures. The kit uses a metal block thermal reference to provide very stable isothermal temperatures between -50oC and 1100oC which are measured with a calibrated sensor and a Labfacility Labcal PRO digital indicator.
Any temperature measurement installation comprises the sensor (with or without a signal converter/transmitter), interconnecting wires and an associated instrument display/computer). In order to verify the overall accuracy of measurement, a heat source (thermal reference) must be used to generate an accurately known stable temperature which is measured independently of the installation.
The probe from the site installation is inserted in the thermal block and its reading is compared with the known (calibrated) temperature. The Labcal PRO is a laboratory standard digital temperature meter with many important and useful features. It is designed to provide fast, precise temperature measurement on an absolute or comparative basis.
For example, a display of either the reference sensor or the installed sensor value can be selected in sequence or as a differential temperature. Since the indicator remembers the corrected readings of the reference sensor, the display directly indicates its actual temperature. The difference reading shown, say +0.5oC is thus the total actual error in the installation; the user does not have to refer to tables or carry out calculations.
Readings can be displayed in oC, oF, Kelvin, millivolts or Ohms as desired, which makes the system attractive to both industrial and laboratory users. The microprocessor based instrument is digitally configured for thermocouple ( types J, K, T, E, N, R, S & B) and Pt100 sensors; calibrated sensors can have their "Cal-point" values set into a memory in which case the instrument can display direct, corrected temperatures with probe tolerances eliminated from readings. Display resolution is 0.01oC.
A calibration certificate is available for the reference sensor and indicator combination which can be periodically recertified at an appropriate laboratory. The complete system is easily transported and can be carried by one person. It can be used in electrically noisy environments and is ruggedly constructed. A fast warm-up feature of the dry block calibrator allows readings to be made within 15 to 30 minutes from switch-on. A wide range of reference temperatures between -50oC and +1100oC can be provided. Designed for ease of use, readings are provided directly in oC or oF as required without the need for calculation from tables.


